The Halloween craft table
A jam jar. A paper bag.
A suspiciously good label.
You do not need a cupboard full of Halloween decorations. Start with a clean jar, a few treat bags, and a label printer: ordinary packaging can become a tiny apothecary, a candle gift, or a favor with someone’s name on it. Here are a few projects worth clearing the kitchen table for.
Halloween label ideas worth making
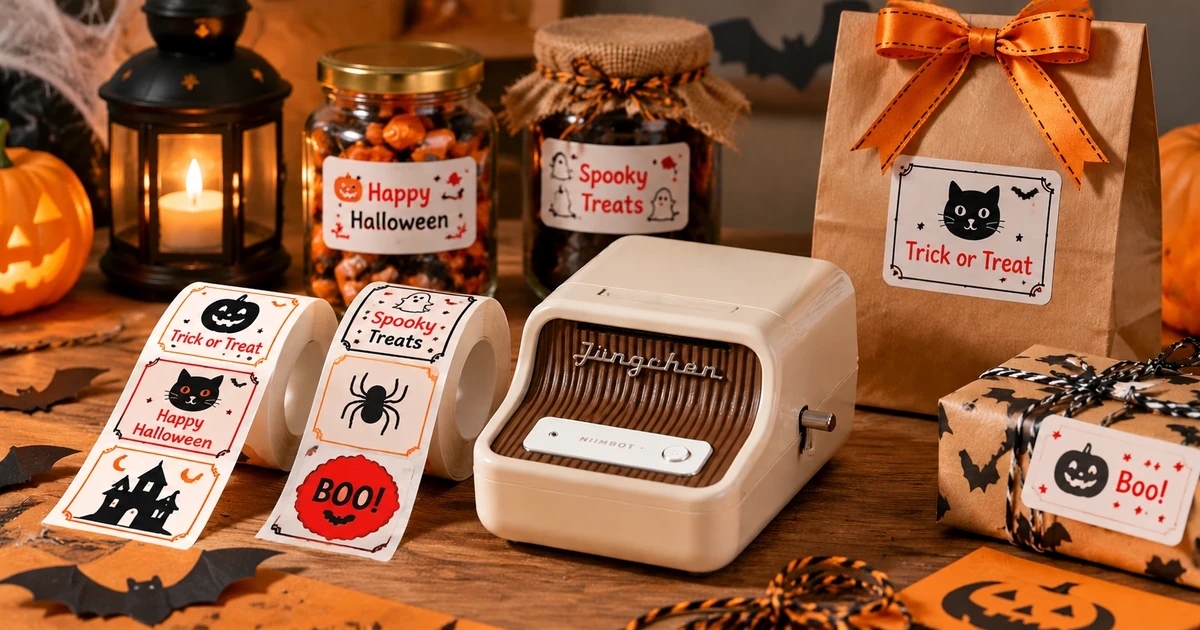
Pick one look before opening a design app. An old apothecary calls for thin borders and serif lettering; a children’s party might suit round ghosts and big, friendly names. Either can work with plain black printing. The orange ribbon, purple tissue, and kraft paper can supply the color.
A miniature apothecary
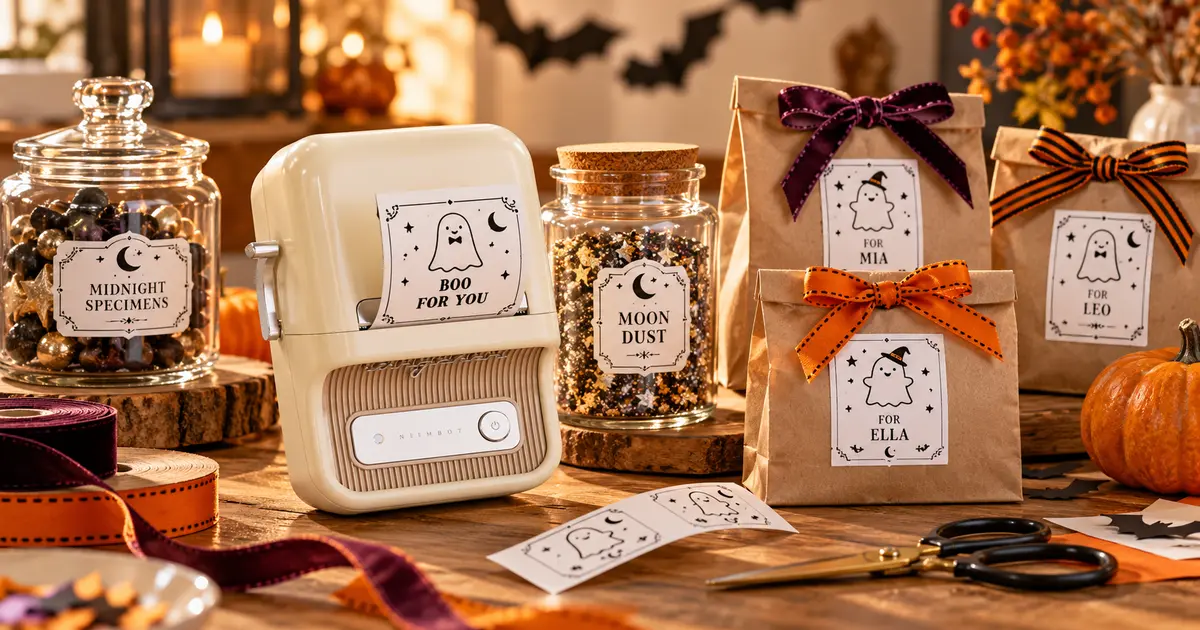
Give a display jar a name like “Midnight Specimens.” Add a small moon and a fictional batch number. Keep decorative props separate from anything guests will eat or drink.
A bag with a name
Fold a paper bag, add a name label, and finish with a short ribbon. “A little boo for Mia” feels more personal than another identical party favor.
A candle in costume
Dress a candle’s gift box or removable outer sleeve with a Halloween name. Keep the candle’s existing instructions and safety information intact.
Make the collection match without making everything identical
Choose a single border and repeat it across jars, bags, and gift boxes. Change the name and one small illustration for each item. That is enough to tie the table together; you do not need pumpkins, bats, webs, and stars on every label.
If you are decorating food or drink packaging, keep the real contents easy to identify. “Witch’s Crunch” can sit above “Caramel Popcorn,” but it should not hide ingredient or allergen information. Use labels on the outside of packaging, rather than in direct contact with food unless the material is specifically approved for that use.
What you need before printing your Halloween labels
Put the actual containers on the table before deciding on a label size. A design that fills your phone screen may be only a few centimeters wide when printed. Measure the smooth area you want to cover, not the entire height of the jar.
- Your packaging: clean jars, paper bags, small boxes, or cardstock tags.
- Compatible adhesive labels: choose a roll specifically supported by your printer.
- A simple measuring tool: a ruler and scrap paper are enough to test the fit.
- A few finishing materials: ribbon, twine, tissue paper, or a paper sleeve.
White, clear, or a seasonal design?
White labels are a useful starting point because black text remains visible against dark jars and patterned wrapping. Clear labels can look lovely on pale glass, but fine lettering may disappear when dark contents sit behind it. Check the contrast with the container filled, not just empty.
A seasonal preprinted label adds decoration without asking the printer to create a colored background. Check the exact roll’s model compatibility and leave your text inside its usable area. Do not assume that labels for B21 and B21 Pro are interchangeable just because the names are similar.
The scrap-paper test: Cut a rectangle to your proposed label dimensions. Hold it against the jar, close the box, or fold the bag. If it crosses a seam or wraps out of view, change the size before printing.
How to make custom candle labels for Halloween
A good candle label gives the gift a mood without turning it into a paragraph. Start with a short name, then add the real scent if there is room. “Midnight Pumpkin” might suit a pumpkin-scented candle; “Old Library” could work for a woody fragrance. Use names that fit what you are actually giving.
Let the name carry the design
Try a name on two lines with a tiny crescent above it. Keep the scent beneath in a plain, smaller font. If the label feels crowded, remove an ornament before making the words smaller.
PUMPKINPumpkin & spice
FOR YOUFrom your favorite ghost
SPECIMENSDisplay prop · No. 13
Design examples, not print-to-scale templates. Use accurate scent and product details.
Measure, test, and apply
For a gift box, center the label on the front panel and leave space for the ribbon. For a removable sleeve, check that the label sits flat once the sleeve is wrapped. Print one sample and read it from arm’s length before producing the rest.
Apply to a clean, dry surface, pressing from the center toward the edges. On curved packaging, use a narrower label if the corners refuse to sit flat. More adhesive is not a substitute for a shape that fits.
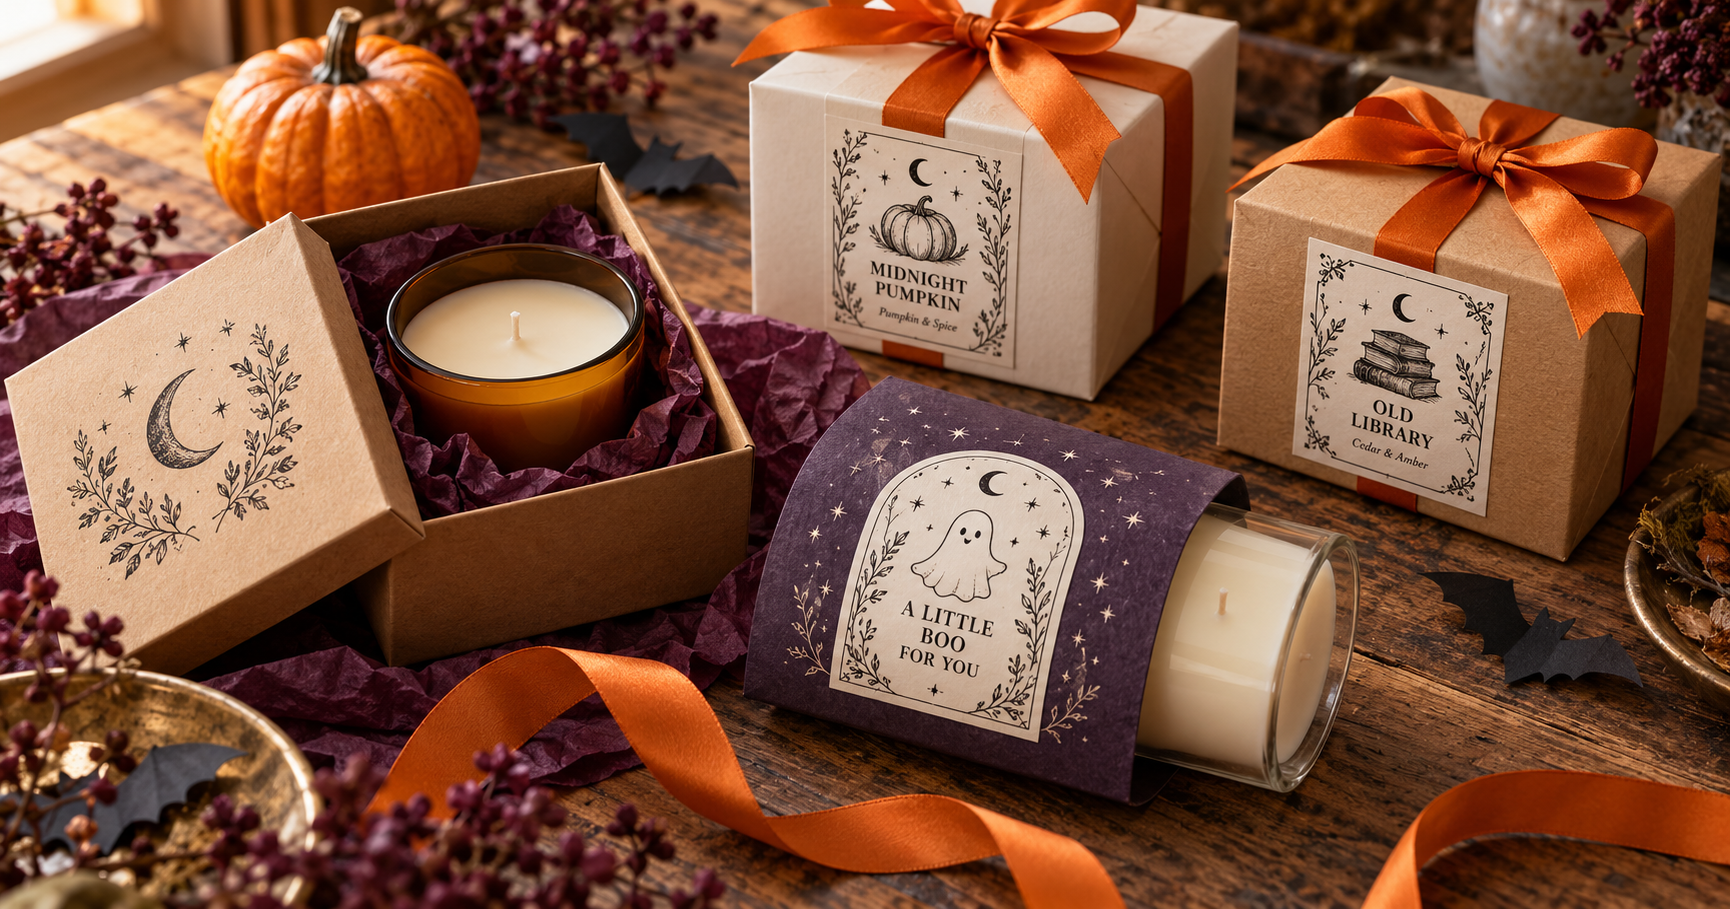
For candle projects: Ordinary decorative thermal labels are not automatically heat-resistant or suitable for a candle vessel that gets hot. The projects here focus on outer gift packaging. Remove decorative wrapping before lighting, retain all original warnings, and follow the candle manufacturer’s instructions.
DIY Halloween gift labels that feel personal
A name usually does more for a favor than another layer of decoration. Write your guest list first, check the spelling, and choose a short message that fits beside it. Keep a few spare labels for the person who joins at the last minute.
Give treat bags a small surprise
Fold the top of a kraft bag twice and place a label on the flat front. A ghost drawing and “Reserved for Leo” are enough. If you use a sticker over the folded opening, test that it holds without peeling; decorative labels are not a substitute for appropriate food packaging or sealing.
- “A little boo for you.”
- “Reserved for [Name].”
- “Open for a small fright.”
- “From your favorite ghost.”
Use a tag when the wrapping is awkward
Rough fabric, heavily textured paper, and curved ribbons can be difficult surfaces for a sticker. Put the label on a cardstock tag instead, then tie the tag to the package. You keep the design without depending on adhesive to grip an unsuitable surface.
Repeat one layout across the party favors
Keep the border and name position the same, then swap a moon for a bat or a star. For family gifts, the small picture can be different for each recipient. For a larger gathering, repeating one design makes names easier to scan when the bags are lined up together.
If you are making DIY present labels for several households, group the names before printing. Set the printed labels beside their matching packages as you work. It is a small habit, but it saves peeling the right name off the wrong gift.
Design once, then print your Halloween collection
Start with the longest name on your list. “Bo” fits almost anywhere; “Alexandra” will show whether the layout has enough breathing room. Build around the awkward example first, then check that shorter names still look balanced.
Build a reusable layout
- Match the label settings to the roll. Use the correct dimensions and leave room inside the printable edges.
- Add your main text. Make the recipient’s name or candle name the easiest thing to read.
- Add one border and one small illustration. A crescent, ghost, or simple bat is a good starting point.
- Print one test. Check the actual label before changing all the names.
- Keep the successful layout. Save it if that option is available in your app version, then edit the details for the next package.
The NIIMBOT B21 Pro supports phone-based design through the NIIMBOT App and Bluetooth printing. Its 300 dpi thermal output suits text, line art, and monochrome images. It does not turn an orange pumpkin illustration into a full-color sticker; use black artwork and let your wrapping supply the color.
Try a photo label for a family gift
A small monochrome photo of last year’s costume can be a fun alternative to clip art. Choose a clear subject against a simple background, crop closely, and test the contrast. Keep the caption short so the face remains the focus.
Do not use tiny text to rescue an overcrowded design. Remove a second border, simplify the artwork, or move the message onto a separate tag. One readable name beats five decorative details that blur together.
Thinking of making a whole set?
Check the B21 Pro and its available label options before choosing your final layout.
Small fixes that make handmade labels look better
If the design looks busy, take something away
Cover the illustration with your thumb and look at the text again. If the label suddenly feels clearer, the illustration may be too large. Try a smaller icon or remove it entirely; a strong name and a careful border can carry the Halloween mood on their own.
If a clear label disappears, change the contrast
Black printing on a dark bottle will be difficult to see. Try a white label, place it on a lighter outer sleeve, or use the clear version on a pale container instead. Changing the typeface will not solve every background problem.
If the label sits crooked, give yourself a reference
Line up a few boxes on a flat table and choose the same edge as your guide. Apply the first label, compare the next one beside it, and continue in small groups. For rounded jars, make sure the front faces the same way before judging the alignment.
When corners lift, check for moisture, oil, texture, or a sharply curved surface. Let the packaging dry, try a smaller label, or switch to a tag. Follow the selected material’s instructions rather than assuming every label is waterproof, washable, or heat-resistant.
FAQs about Halloween craft labels
Can B21 Pro print Halloween designs in full color?
No. The projects here use monochrome printing, not full-color photo printing. Add color through packaging, ribbon, or a compatible preprinted label design.
What size works for a candle gift?
Measure the flat panel on the gift box or removable sleeve. Make a paper mockup first, then select a compatible roll. There is no single size that fits every candle jar or box.
Can I use the same labels on glass, paper, and plastic?
Adhesion depends on the material, finish, and surface condition. Test the exact combination before preparing a full batch. A cardstock tag is a useful alternative when the packaging is rough or curved.
Can I leave decorative wrapping on a candle while it burns?
No. Remove gift wrapping, ribbon, tags, and decorative sleeves before lighting, and follow the candle manufacturer’s instructions. Do not treat ordinary decorative labels as heat-rated safety labels.
Can I reuse these ideas for Christmas?
Yes. Keep the layout, swap the moon or bat for a star or tree, and change the message. A design with a simple border is easy to adapt without starting from a blank page.
Make one you like. Then make the next.
Start with a single jar or gift bag. Check the size, print a sample, and see how it looks on the real package. Once that first label works, the rest of the collection becomes a matter of names, small details, and a little ribbon.
- Choose a clear name before adding decoration.
- Test the size and contrast on the actual packaging.
- Keep food information and candle warnings visible.
- Use the same layout to bring the collection together.
Your craft table is ready.
If a label printer is the missing piece, take a closer look at B21 Pro.